My sewing room makeover and DIY milk paint.
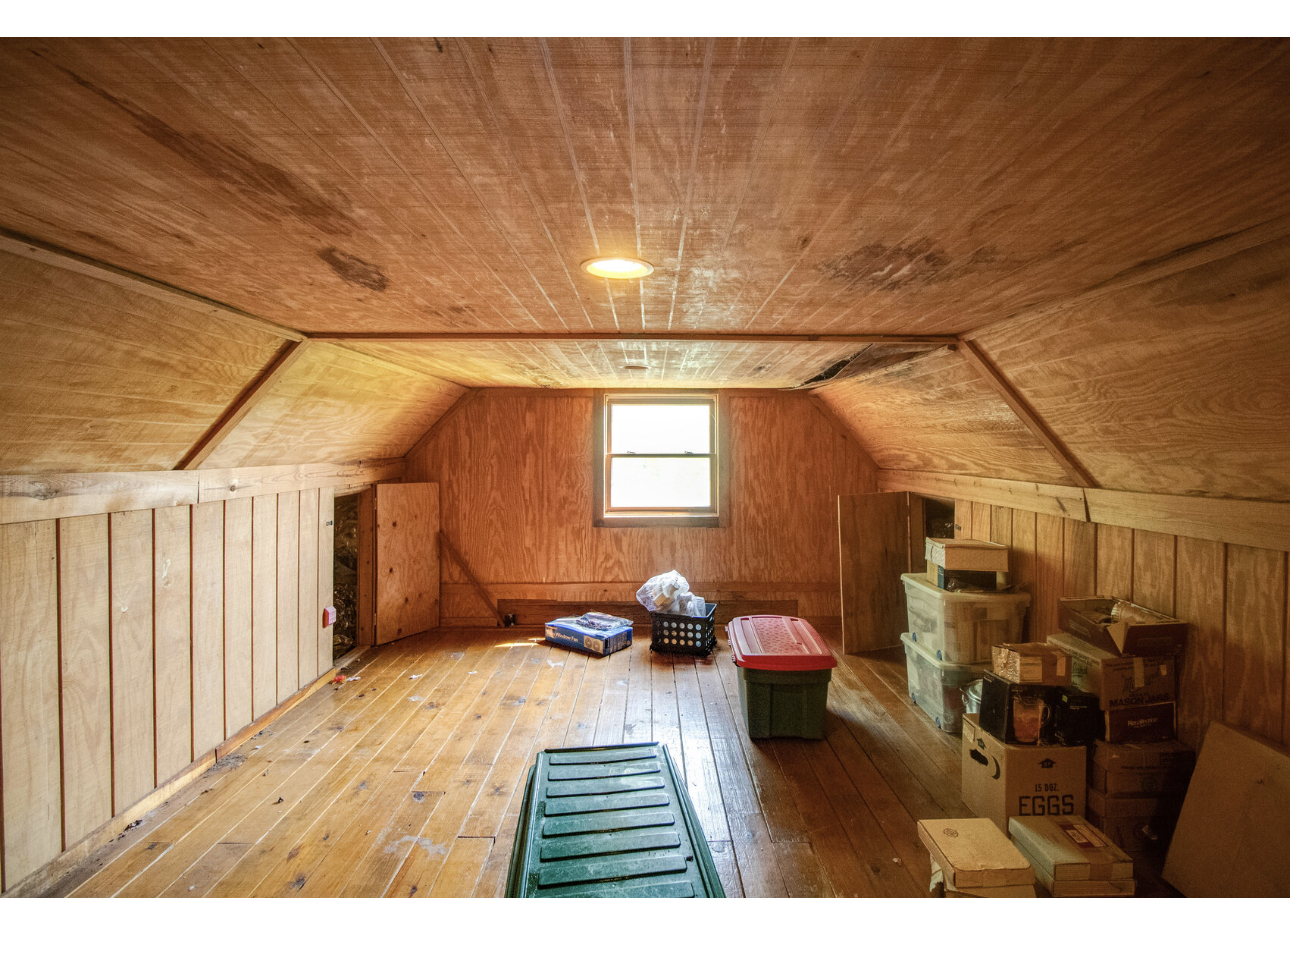
This is what the room that was to be my sewing space looked like on the day we viewed the house. The roof had been leaking, critters had taken up shelter (squirrels), and frankly the house smelled.
The room wasn’t at the top of the priority list so nothing has been done in there other than cleaning and making it my sewing room.

Here it is after we moved in and after about the 5th time I rearranged it, swapped out tables, and moved my AccuQuilt dies into the closet. It’s a nice sized room at 12; x 16′ and I am able to now have everything in one room instead of being spread out between 2 bedrooms and my office.
I love the floor but the entire room is just too warm for me. The raw wood on the ceiling and walls is rough cut wood and collects dust, threads, dust bunnies, batting fly away’s and your cloths if you get too close to it. The wood has a nice texture (other than the previous dislikes) but I am a white wall person and this is just not inspiring.
After playing with colors in AI I settled on white and pastel green. Then I played more and have finally decided this is the plan.

The whitewash look is really appealing to me and in the real world my knee walls aren’t going to be this gorgeous, lol. Presently, I am planning on a tin ceiling.
Paint
Being the creative but overtaxed Illinois resident that I am, frustrated with yet another new tax for each can of paint you purchase I decided to make my own and share my progress.
Before you begin painting your project piece you need to decide if you are whitewashing or would like a completely opaque piece.
For opaque – using the recipe below paint a coat on a scrap piece of wood. Allow to dry and paint another coat on 2/3 of the wood. Allow to dry and apply a coat to just half of your second coat. Once it is completely dry compare the side with 2 layers and 3 layers of paint. At this point you can pretty much tell if you will get the coverage you are looking for. If you are not you can decrease the water in the recipe and/or increase the Titanium Dioxide (for white opaque paint).
My preference is to keep the water the same and double the amount of Titanium Dioxide. You do you.
For whitewashing– use the base recipe below. Apply a coat on a scrap piece of wood. If the wood is very porous it will soak this coat very quickly so as soon as you apply this first coat wipe with a dry microfiber towel. Allow to dry overnight.
The next day you can leave it as is, or apply another coat. You will wipe with a microfiber towel as soon as you apply the second coat.
The water and Titanium Dioxide can be adjusted here too. You do not want the whitewashing paint too thick or opaque. So start with adding just a little water because you do not want it to be so thin that you cannot paint it on the wall.
My preference– using the base recipe below, I doubled the Titanium Dioxide and painted the slat wall with 4 coats. After 4th coat I wiped the wall down with a wet microfiber towel, scrubbing a little harder willy nilly (my grandson loves that term, giggles every time I say it).
For the bottom half of my wall I added water until my paint had the consistency of milk. It has 2 coats of paint and I wiped immediately after applying each coat. See below. My lighting isn’t the greatest since taking the led’s down to paint. I do need to apply another coat to the knee wall to even things out. On the slanted wall-you can see the spots I scrubbed harder.
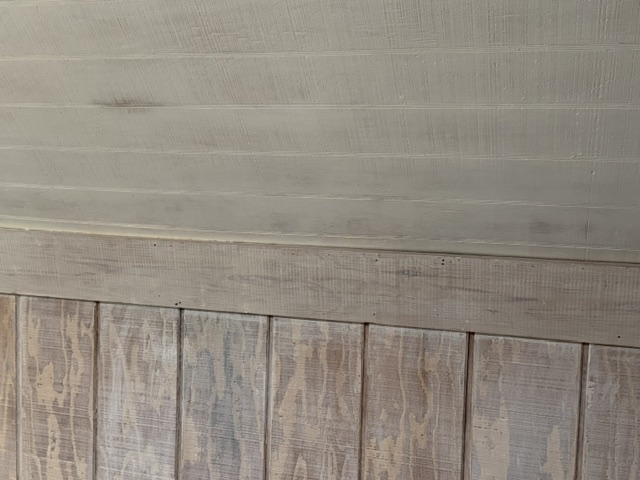
The horizontal board had been stained previously and was a very smooth piece of wood. When the first coat started puddling on the board I wiped with a dry microfiber towel. Allowed to dry overnight and applied a second coat, wiping when the paint started puddling. This board now has a very nice slick sheen to it.
The rest of the wall no longer snags your clothing, I will have to let you know if it collects thread and dust as bad. More photos to come as I progress.
Milk paint recipe-Can be used on any porous surface
- 1 cup Non Fat Milk Powder
- 1 -1/2 cup of warm water
- 1 -1/2 tablespoon of Borax
- 2 tablespoon Titanium Dioxide. Add more for a more opaque white. My final recipe for more opaque is 4 tablespoons.
Directions
- Add milk powder to 1 cup of warm water in a large bowel or quart jar. Shake or stir until the lumps are gone, a mixer works well too. Set aside. (An plastic ice cream container with a lid is perfect ).
- Bring to boil 1/2 cup water, add Borax and stir to dissolve.
- Let the Borax and water cool to room temp, then add to milk powder/water mixture. Stir well. I let this sit all afternoon (3-4 hours), stirring occasionally. After dinner, pour a little of the paint mixture into a small bowl and add the Titanium Dioxide and stir until mixed well.
- Pour back into paint mixture, mix well and refrigerate. I have read you should use this within a couple of days, at this point I have used it within 4 days.
When you are ready to paint – stir or shake the refrigerated paint very well and pour what you want to start with in a jar with a lid. Shake periodically while you are painting.
Coloring your paint
You will need Titanium Dioxide or something to make the paint opaque or you will end up with paint more similar to stain.
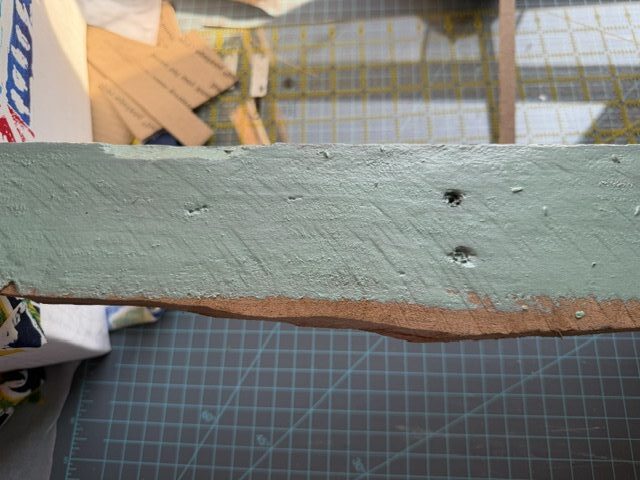
Here is what I will add to my recipe above for the pastel green.
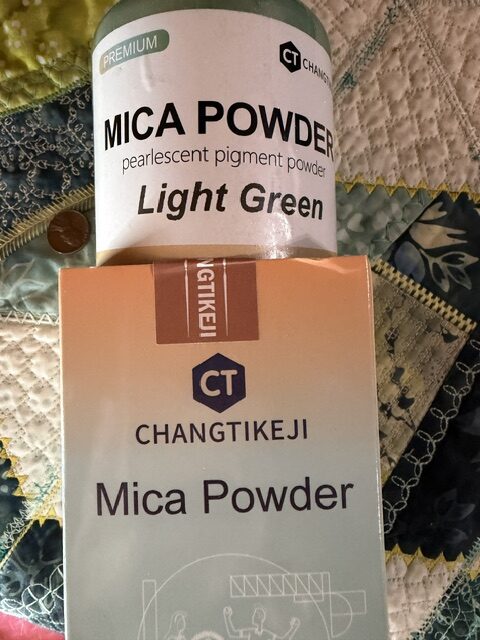
The recipe above with the Mica Powder added. This piece of scrap wood is naturally darker than my room and was not clean before testing the coloring. I cannot recommend other pigments for coloring, Mica Powder works well and comes in a variety of colors. Keep in mind that I am not an expert at this.
This milk paint reminds me of lead paint with its super matte finish. It cleans up easily with warm soapy water and does not have that pungent paint smell. While you are painting you will crave a milkshake but there is no residual odor.
I do not plan to add a sealer over my finished walls but you may choose to, information is readily available with a google search.
Keep in mind if you are painting a previously finished surface that you will need to sand the piece.
All changes I made to the base recipe I made note of the adjustments. When I got the coverage I wanted I then made a much larger batch. In all of my research most stated you need at least 3 coats of milk paint and that may be so with the store bought milk paint. However, with more testing, adjusting water and pigment amounts you could limit it to 2 coats with an opaque finish. I wanted a little of the natural wood to show through so I was stingy with the pigments.
Did I leave anything out? If so, leave a comment and I will answer to the best of my knowledge.
Join me every Thursday for Put your foot down.

thank you for the more in depth explanation. much appreciated (from your neighbor is “missery”. cross the border any time for cheaper gas …lol.)
We definitely do.
Looking good, Denise! I think you will love it.
For sure.
I can surely understand the frustration with the awful taxes and am so glad you found a way to evade at least one. Your room will be beautiful!
Lol,I hope it turns out well.
Hi Denise, you’ve done amazing work. It looks and will look awesome once you’re done! Thanks for sharing your process 🙂
Thank you, I hope so. I keep going back and forth between loving it and being unsure. Fact-anything will look better than that warm wood.
I love your vision for it, Denise, including that tin ceiling. So far, so good!!!
The ceiling with take longer but that’s okay, it is already so much better.